Create and edit groups
Small groups, ministries and teams.
Create and edit groups
Set up a group or ministry, choose its leaders and members, tag it, and decide who can see it.
Staff with group permissions can create, edit and delete groups. A group leader can also edit their own group if the group has Allow Leaders to Edit turned on.
Create a group
- On the Dashboard, Directory or Groups tab, tap the round + button, then New Group.
- Fill in the details (below) and tap ✓ at the top right to save.
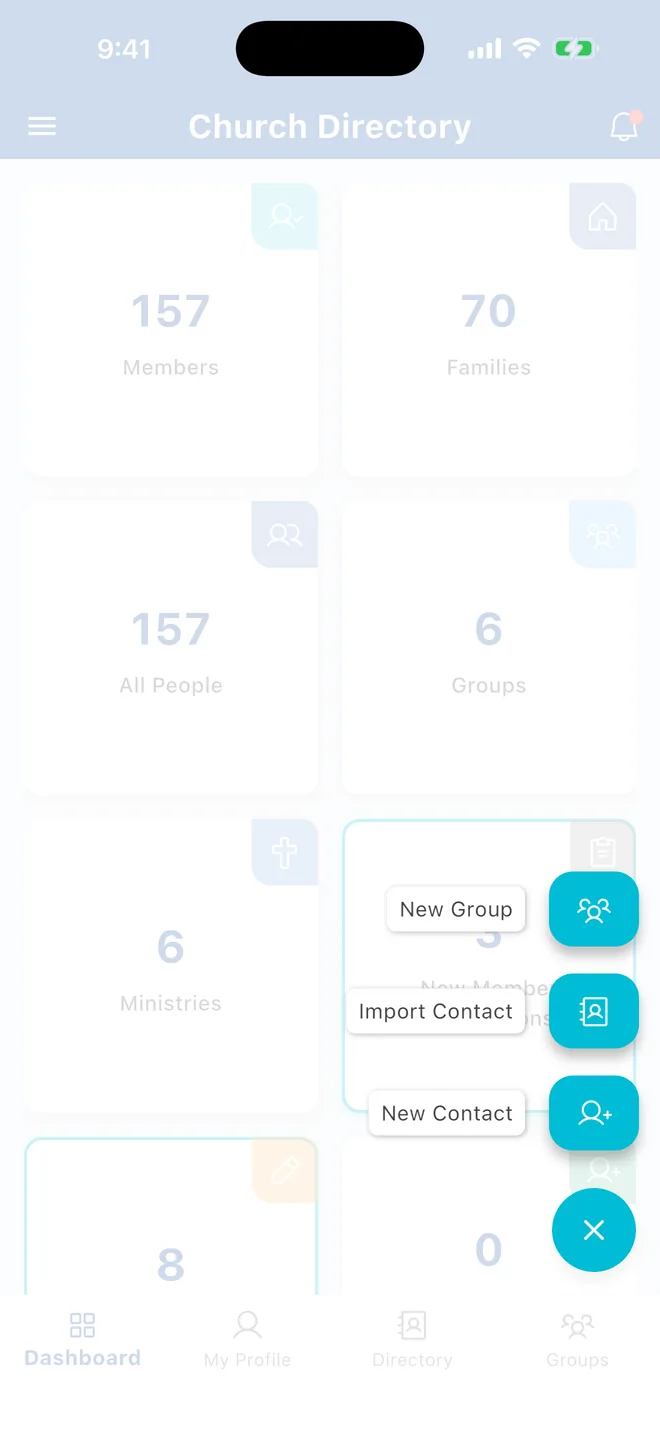
The + button is only shown to staff with dashboard access. If you can't see it, use the web app.
- Go to Groups and click Add Group.
- Fill in the details (below) and click Create Group.
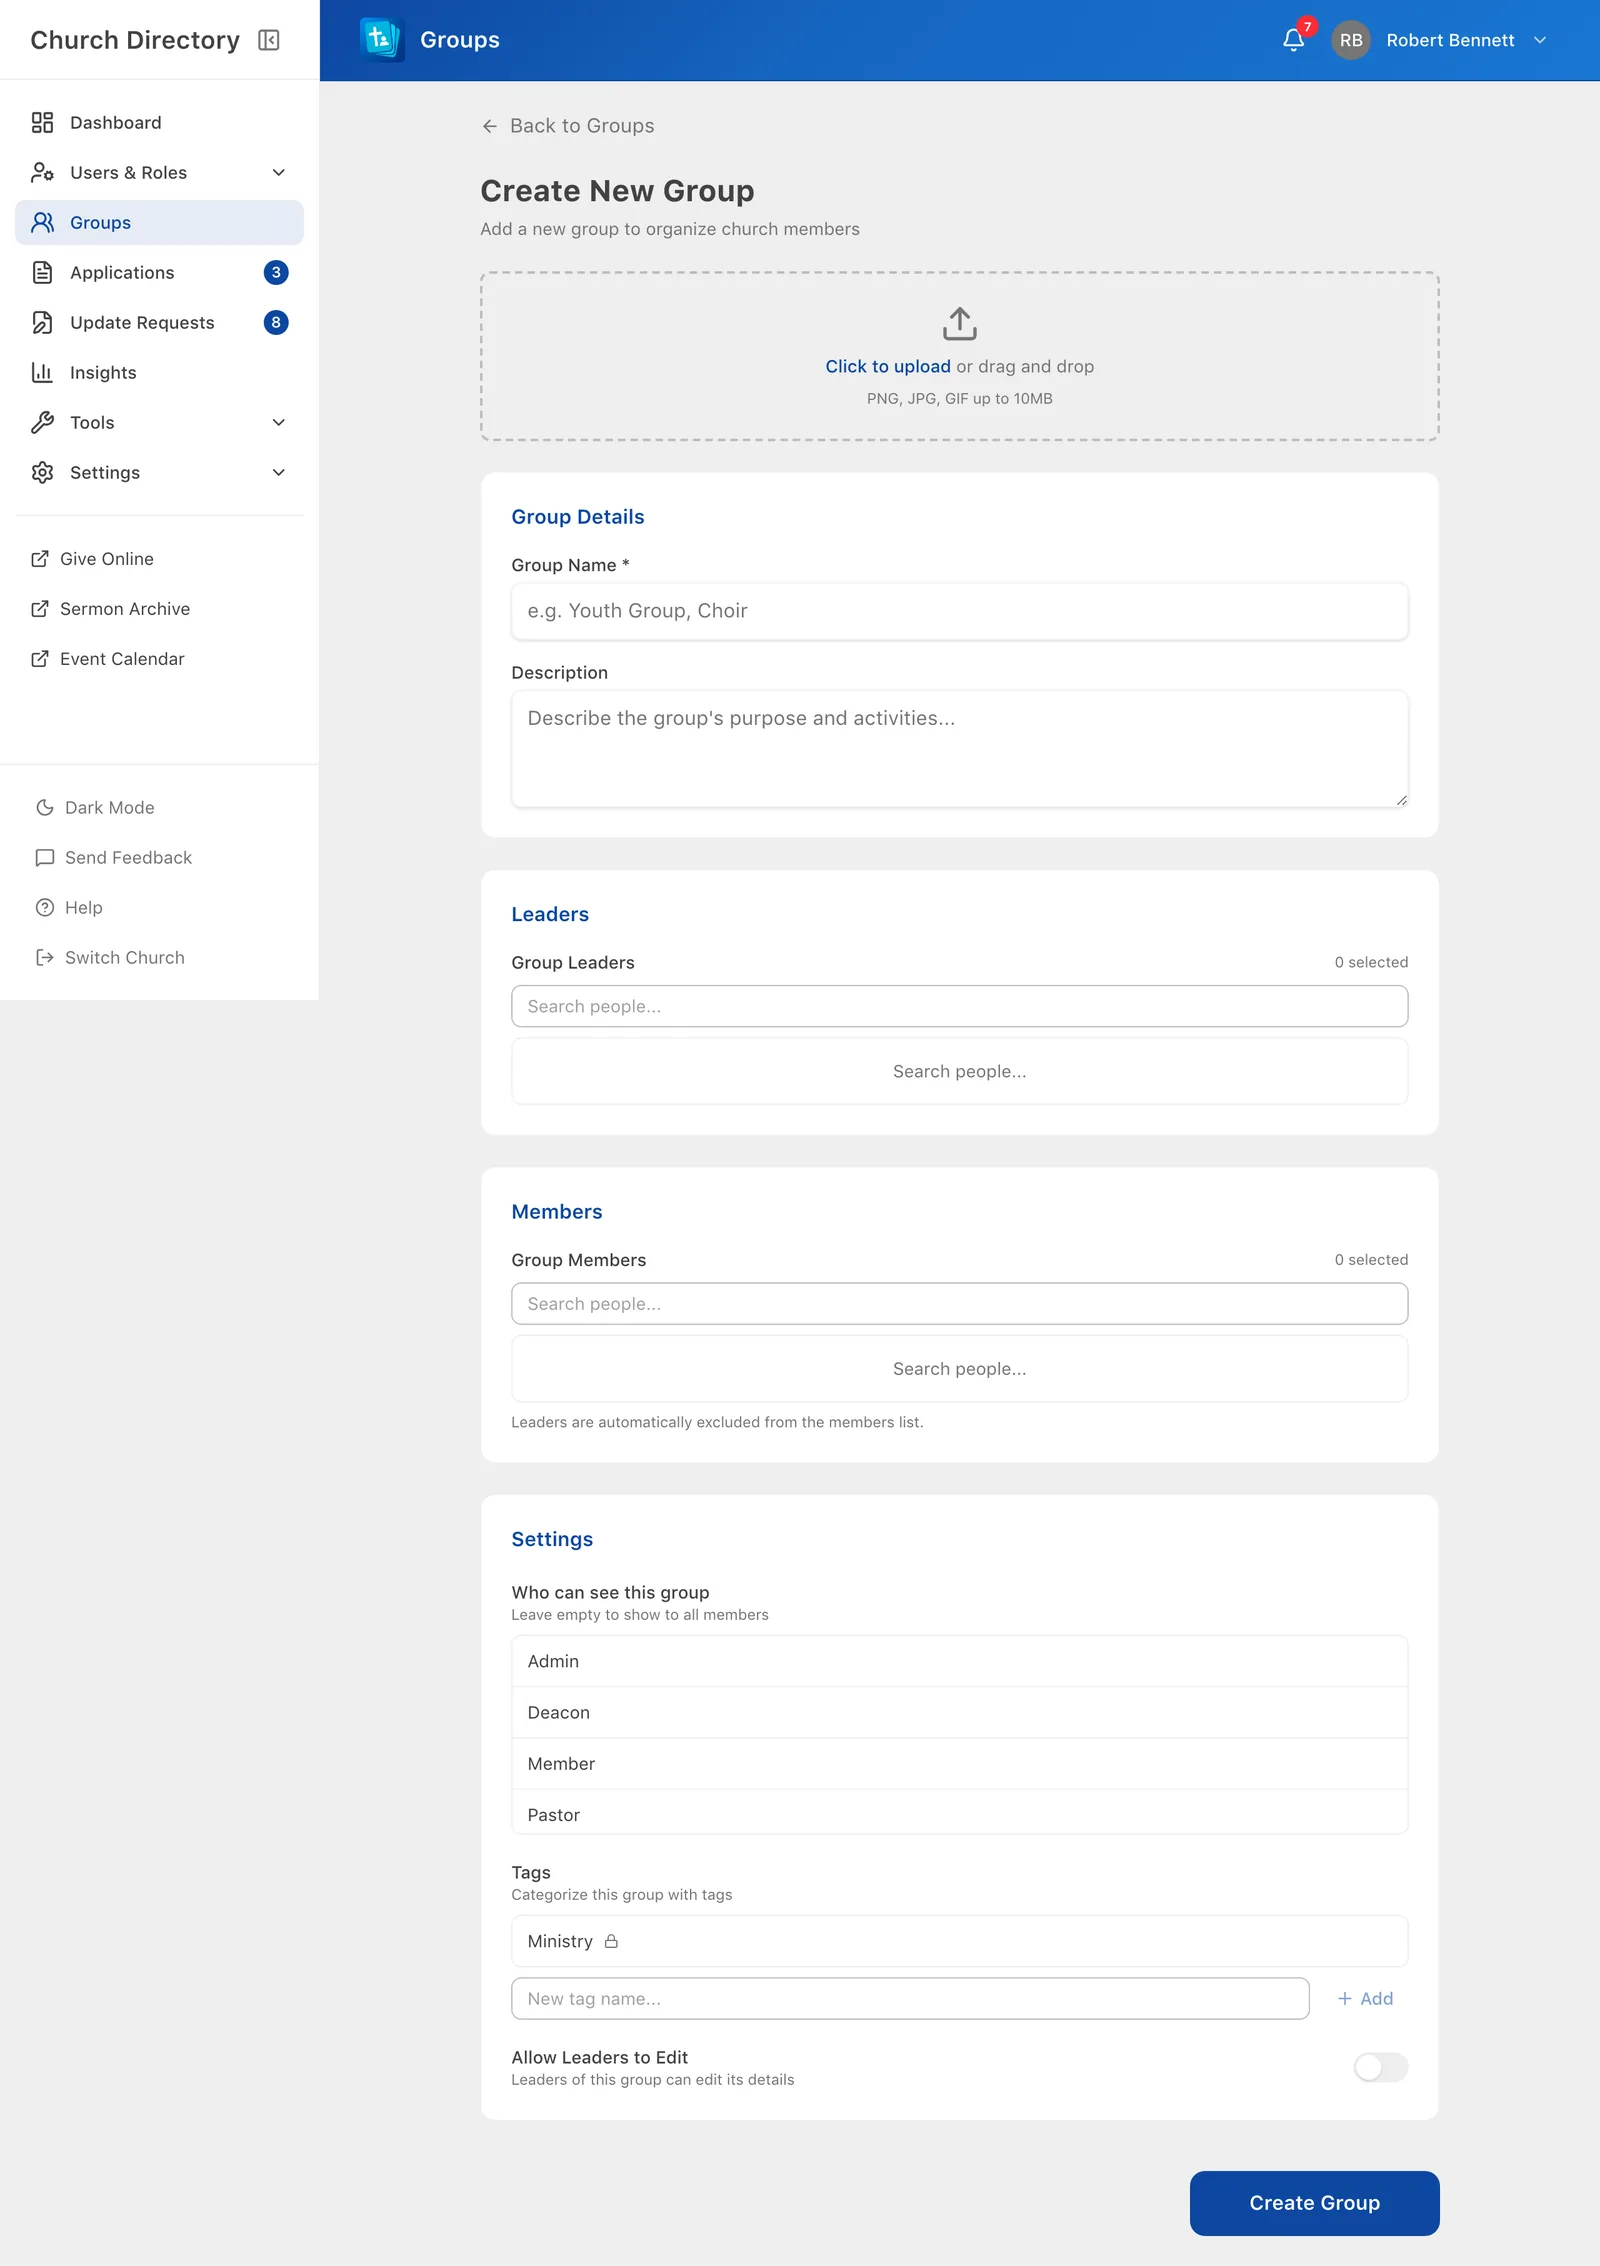
Group details
- Name (required), description and a photo.
- Leaders and members. Leaders appear separately at the top of the group. Someone can't be both.
- Tags sort groups into tabs, such as Ministry, Youth or Bible Study. Administrators can create, rename and delete tags right here.
- Allow Leaders to Edit lets this group's leaders change its details and members themselves.
- Who can see this group:
- No roles picked (the default): only the group's own members and leaders can see it.
- Roles picked: everyone with those roles can see it, plus the group's leaders. Group members who don't have one of those roles won't see it. That's useful for staff-only lists, such as people to follow up with.
- People who can view all groups, such as Admins, always see every group.
Edit or delete a group
Open the group and tap ⋮ › Edit or Delete, or press and hold the group in the list. Save edits with ✓.
Open the group and use the ⋮ menu at the top right: Edit or Delete. Click Save Changes when you're done editing.
Deleting a group doesn't delete its people, only the group.
Related Articles
Was this article helpful?
Thank you for your feedback!